Transair® Stainless Steel Pipe Installation Instructions 3"(76mm) & 4"(101mm)
< Back to Previous Page
Sound engineering practice for the optimization of an air pipe system
■ When installing a Transair® system, work should be performed in accordance with good engineering practice.
■ Bends and bypasses represent sources of pressure drop.
■ Keep in-line pipe diameter reductions to a minimum.
■ The diameter of the pipe will influence pressure drop and the operation of point-of-use equipment.
■ Select the diameter according to the required flow rate and acceptable pressure drop at the point of use.
■ Never encase the network in a hard solid mass, in order to facilitate maintenance or servicing.
■ To insulate Transair® industrial water systems thermally, we recommend insulating the Transair® stainless steel pipes.
■ Position drops and feeds to take-off points as close as possible to the point of use.
3"(76mm) & 4"(101mm) Installation Instructions
Tools
Click Here for the Tools Page
 Pipe Cutter for Aluminum Pipe
ref. 6698 03 01
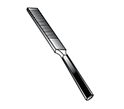 File
File Deburring Tool for Aluminum Pipe
ref. 6698 04 02
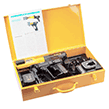 Portable Tool Kit
ref. Ew01 00 01 (220V) Or Ew01 00 03 (110V)
 Pipe Forming Jaw Set
EW02 M4 00 (Ø 42), EW02 M6 00 (Ø 60)
EW02 L1 00 (Ø 76), EW02 L3 00 (Ø 101)
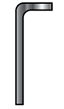 Allen Key
Procedure
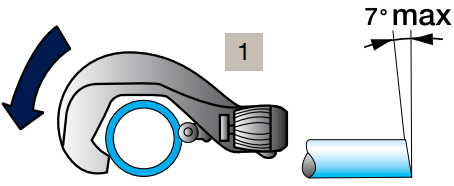
1. Cutting the pipe:
place the pipe in the pipe cutter position the blade onto the pipe - rotate the pipe cutter around the pipe while gently tightening the wheel.
place the pipe in the pipe cutter position the blade onto the pipe - rotate the pipe cutter around the pipe while gently tightening the wheel.
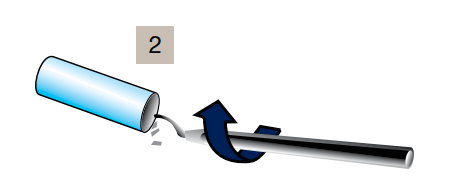
2. Carefully chamfer and deburr the end of the pipe with a file.

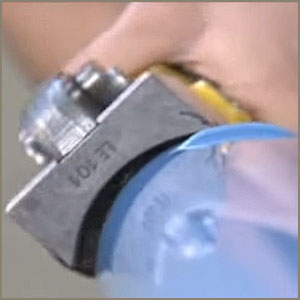
3. Creating the lugs with the Portable Crimping Tool Kit:
Open the retaining pin at the front of the machine by pressing the jaw release button.
Open the retaining pin at the front of the machine by pressing the jaw release button.

Place the jaws in the housing.
Lock in position by closing the retaining pin
Lock in position by closing the retaining pin
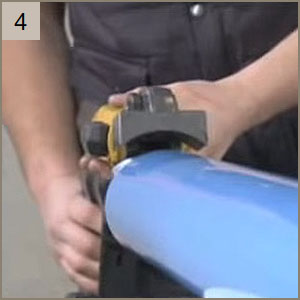
4. Manually open the jaws of the clamp and insert the aluminum pipe into the clamp as far as it will go

Release the jaws. Press the trigger and crimp the tube until a ‘snap’ sound is heard
Re-open the two jaws to remove the pipe and rotate the pipe slightly
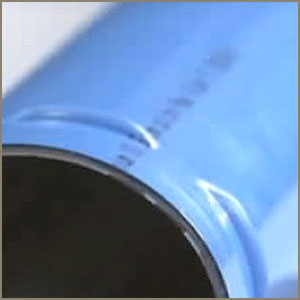
Renew the operation until the required minimum number of lugs for each diameter is achieved
Min. number of lugs:
Ø 3" (76mm) (6 lugs)
Ø 4" (101mm) (7 lugs)
Do not overlap the lugs!

Min. number of lugs:
Ø 3" (76mm) (6 lugs)
Ø 4" (101mm) (7 lugs)
Do not overlap the lugs!
Connection
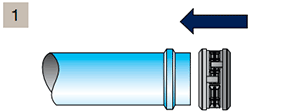
1. Slip the cartridge over the end of the first pipe fully up to the shoulder

2. Bring the second pipe to the cartridge and slide fully up to the shoulder

3. Position the clamp over the cartridge / pipe assembly
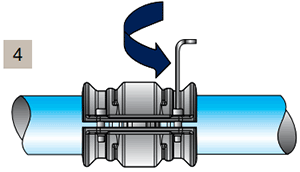
4. Hand tighten the pre-fitted screws with 6mm Allen key
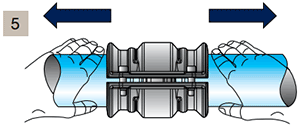
5. Pull the pipes fully back towards the outside of the clamp

6. Tighten the clamp screws as follows:
■ mini tightening torque: 7.37 lbs ft
■ maxi tightening torque: make the 2 clamps touch together 17.5 lb-ft
■ mini tightening torque: 7.37 lbs ft
■ maxi tightening torque: make the 2 clamps touch together 17.5 lb-ft
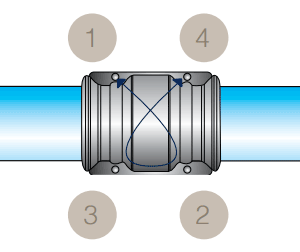

For effective clamp sealing, screw tightening should be performed on
alternate sides of the clamp as shown.
Disonnection
To disconnect, perform the same operations in reverse order.
✉ Email this Page
Also Available from mdi
 |
TransairPipeSales.com is owned and operated by mdi, Manufacturers Distributor, Inc. mdi is an Authorized Parker Transair Piping System Distributor. Click Here to view the mdi Line Sheet. |